Stripping Paint with a Heat Gun: Techniques & Tips
Intro
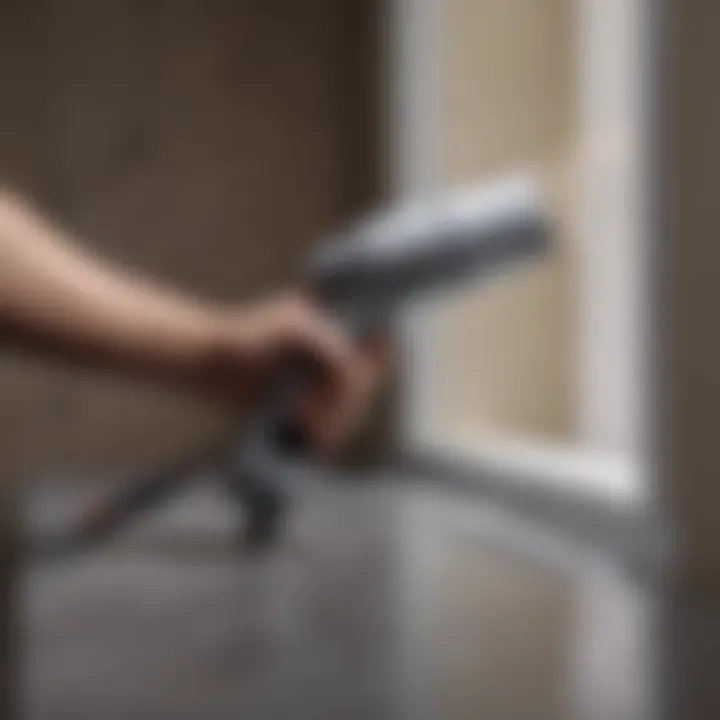
Stripping paint is a common task for homeowners and DIY enthusiasts. It can transform old furniture, fixtures, or walls to a fresh new look. One effective way to remove paint is through the use of a heat gun. This method can be both efficient and straightforward when done correctly.
Using a heat gun to strip paint involves applying heat that softens the paint, making it easy to scrape away. This technique has several advantages over traditional methods, such as chemical paint strippers, which can be harsh and toxic.
In this guide, we will explore various aspects of paint stripping with a heat gun. We will discuss techniques, safety measures, tools required, and best practices for successful outcomes. Additionally, we will consider post-stripping care to maintain the quality of your surfaces.
The information here is designed to equip homeowners and DIY enthusiasts with the knowledge necessary to approach paint removal confidently. It will present a clear roadmap for effective and safe paint stripping.
Tools Needed
Before starting the paint stripping process with a heat gun, it is crucial to gather the right tools. Here’s what you will need:
- Heat Gun: Choose a reliable heat gun with adjustable temperature settings.
- Scraper or Putty Knife: A sturdy scraper helps to remove softened paint effectively.
- Protective Gear: Use gloves, safety goggles, and a mask to protect against fumes and debris.
- Drop Cloths: Protect surfaces beneath the area you will be working on.
- Paint Stripper (for tough spots): In case the heat gun doesn’t fully remove the paint, a paint stripper can assist.
Using the right tools ensures efficiency and safety during the process.
Safety Measures
Working with a heat gun requires caution. Here are some essential safety measures to consider:
- Ventilation: Ensure the area is well-ventilated to avoid inhaling fumes.
- Keep Flammable Materials Away: Remove any flammable items from the working area to prevent accidents.
- Mind the Temperature: Heat guns can reach high temperatures. Keep the gun moving to prevent scorching the surface.
- Use Protective Equipment: Always wear safety glasses and gloves to protect your eyes and skin.
The importance of safety in paint stripping cannot be overstated. Proper precautions can prevent accidents and ensure a smooth process.
Techniques for Stripping Paint
When it comes to using a heat gun effectively, here are some key techniques:
- Start at a Low Temperature: Begin with a low heat setting and gradually increase if necessary. This minimizes damage to the underlying surface.
- Angle the Nozzle: Hold the heat gun at an angle to evenly distribute heat over the paint's surface.
- Scrape Immediately: Once the paint starts to bubble, use the scraper to remove it while it is still hot. This maximizes efficiency.
- Work in Sections: Focus on smaller sections to avoid letting the paint cool down before scraping.
Implementing these techniques can significantly improve your results when stripping paint.
Post-Stripping Care
After the paint has been removed, it is essential to prepare the surface for finishing touches. Here are some actions to consider:
- Clean the Surface: Wipe away any dust and debris left after scraping.
- Sand if Necessary: Lightly sand the area to smooth out any imperfections.
- Consider Priming: If you plan to repaint, applying a primer will help the new paint adhere better.
Taking these steps will help maintain the integrity of your surfaces and pave the way for a successful project.
Remember: Patience and attention to detail are key in the paint stripping process.
By following the guidelines presented here, you can confidently strip paint using a heat gun and achieve professional-looking results in your home improvement projects.
Foreword to Heat Gun Paint Stripping
The method of stripping paint with a heat gun holds significance in the domain of DIY home improvement and restoration. Recognizing the efficiency and versatility of a heat gun makes it an appealing choice for many enthusiasts. This technique allows for effectively removing layers of old paint, especially in intricate areas where conventional scraping may not suffice.
Key Elements to Consider:
When using a heat gun, one must factor in safety, technique, and preparation. Understanding these elements helps to maximize results while minimizing potential hazards. With the right approach, individuals can refine their skills and achieve a clean surface, ready for repainting or refinishing.
Understanding the Heat Gun
A heat gun is an essential tool for paint stripping, designed to emit a concentrated stream of hot air. Most models have adjustable temperature settings, usually ranging from 120°F to 1200°F. This temperature versatility allows for careful handling of different surfaces and paint types. The portability of heat guns makes them convenient for both indoor and outdoor projects.
Common uses of heat guns extend beyond paint removal. They can also be employed for tasks such as bending plastics, thawing pipes, and even drying out damp areas. The multifunctional nature of the tool adds significant value for any homeowner or DIY enthusiast looking to invest in an effective equipment.
The Science Behind Heat Application
The effectiveness of paint removal via heat application relies on the thermal response of paint materials. When subjected to high temperatures, paint softens, and in many cases, bubbles. This reaction occurs because heat causes the paint's adhesive properties to break down.
The process of stripping paint involves heating a small section of the material until the paint reaches its softening point. Typically, this point is between 300°F to 600°F, depending on the type of paint. As you apply heat, the goal is to raise the temperature to a level that will allow the paint to lift away from the substrate without damaging it.
"Understanding the science behind heat application not only makes the process more efficient, but also prevents mistakes that could lead to damage and higher repair costs."
Benefits of Using a Heat Gun for Paint Removal
Using a heat gun for paint stripping offers various advantages that make it a preferred method among DIY enthusiasts and homeowners. The technique is not only efficient but also allows for more control, resulting in cleaner work and less mess. These benefits are essential to understand before starting your project, ensuring that time and effort are spent effectively.
Efficiency Compared to Other Methods
One of the standout advantages of heat gun paint removal is its efficiency. Unlike traditional methods such as scraping or using chemical strippers, a heat gun excels in quickly softening paint. This makes it easier to scrape off, significantly reducing the amount of labor required. The heat gun can cover broad areas quickly, helping to strip paint from larger surfaces in less time.
Additionally, this method minimizes physical effort. With a heat gun, users can often complete tasks that may take hours with other tools in a fraction of the time. This speed not only makes the project more manageable but also leads to less fatigue, resulting in a better overall approach to the task at hand.
It is also worth noting that the heat gun is versatile. It can effectively remove multiple layers of paint, which might be challenging for other methods. This versatility adds an extra layer of practicality to its use.
Minimizing Damage to Subsurface Materials
Using a heat gun reduces the risk of damaging the underlying surfaces compared to abrasive methods like sanding. When stripping paint, it's critical to preserve the integrity of the wood or other materials underneath. A heat gun applies thermal energy in a controlled manner, primarily affecting only the paint layer. This careful application helps prevent gouging or scratching of the surface.
Another benefit is that many heat guns come with adjustable temperature settings. This feature allows users to select the ideal temperature for various surfaces. For example, when working with wood, it is feasible to keep the temperature on the lower side to avoid scorching.
Essential Tools and Materials
The successful execution of paint stripping with a heat gun hinges greatly on using the right tools and materials. Choosing suitable equipment is crucial not just for efficiency but also for safety and effectiveness in achieving a clean surface. Here, we will explore the essential tools you need and the role they play in the paint removal process.
Choosing the Right Heat Gun
Selecting a heat gun involves understanding specifications that support effective paint removal. Look for a heat gun with adjustable temperature settings. A temperature range of 750°F to 1,100°F is generally effective for most paint types. This flexibility allows you to find the optimal temperature for the specific project at hand, ensuring you can work with both delicate and resistant paints.
Another important aspect is the nozzle option. A flat nozzle can cover a larger area, while a concentrator nozzle directs heat to a specific spot. This feature enables precision work, particularly in corners or detailed areas. Furthermore, ensure the heat gun has a safety stand. This prevents the risk of fire or burns when you set it down during breaks.
Additional Equipment for Effective Stripping
Scraper
A scraper is a vital tool in the paint stripping process. Its primary role is to lift and remove softened paint layers efficiently. A good scraper should have a sturdy blade made from metal or high-quality plastic. Metal scrapers are beneficial for tough jobs where the paint is especially thick or stubborn. The popularity of scrapers lies in their straightforwardness of use and the variety available for different jobs. Some are designed with ergonomic handles, which provide comfort during extended use.
The unique feature of a metal scraper is its durability. However, care must be taken not to gouge the underlying surface. Using the right angle and technique will help in minimizing damage.
Sanding Block
Sanding blocks are additional tools that aid in surface preparation after paint removal. When paint has been fully stripped, the surface might still feel rough or uneven. A sanding block smooths out these imperfections, making it easier for new paint to adhere properly.
The key characteristic of sanding blocks is their versatility. They come in different grits, allowing you to choose the right one for the task at hand. A coarser grit is useful for heavy sanding, while a finer grit is ideal for finishing touches. Sanding blocks help in achieving a uniform surface texture, which enhances the final appearance after repainting. Yet, they can be labor-intensive, so using them requires patience and diligence.
Protective Gear
Protective gear is essential to ensure safety while stripping paint with a heat gun. This includes eye protection and respiratory masks. The process generates dust and fumes, which can be harmful if inhaled or if they get into your eyes. Proper gear not only minimizes risk but allows for a more focused approach to the task.
Eye protection should meet safety standards for impact resistance. Respiratory masks equipped with filters specifically designed for chemical exposure offer additional protection against paint fumes. The investment in protective gear is well worth it when considering the potential hazards involved. Neglecting this basic precaution can lead to severe health implications, making it a fundamental component of the stripping process.
Using the right tools and materials transforms the paint stripping experience, making it safer and more effective.
Overall, the careful selection of these essential tools and materials lays a solid foundation for the paint stripping endeavor. Understanding their characteristics and specific advantages enhances the effectiveness of the project, paving the way for a successful outcome.
Preparation Before Stripping Paint
Preparation is an essential step in the process of stripping paint with a heat gun. It sets the stage for effective and safe removal, influencing the overall outcome of the project. Taking time to prepare ensures that the process is smoother, more efficient, and less prone to unforeseen complications. Each element of preparation contributes directly to achieving desired results while minimizing risks associated with paint removal.
Choosing the Right Environment
The environment where the stripping task takes place can greatly impact the effectiveness of using a heat gun. It's crucial to select an area that meets specific criteria to facilitate the process.
Ventilation Considerations
Ventilation is perhaps the most significant aspect of choosing the right environment. Proper airflow helps in dispersing fumes and harmful particles produced during paint melting. It reduces the chance of inhaling toxic substances, which is a key safety measure.
Moreover, working in a well-ventilated space prevents the accumulation of heat, reducing the risk of fire hazards. Open windows and doors or the use of fans can enhance airflow, making it a popular and beneficial choice in heat gun paint stripping.
However, one unique feature of proper ventilation is the necessity it creates for surrounding conditions. In extremely windy environments, heat disperses too quickly, thus making effective paint removal more challenging. Therefore, finding a balance is essential.
Surface Protection
Surface protection involves safeguarding areas and objects nearby that aren't meant to be stripped. This step is crucial to avoid unwanted damage from heat exposure and debris that may result from scraping.
The key characteristic of surface protection is its ability to shield adjacent surfaces effectively, ensuring clean and precise work. Materials such as drop cloths, plastic sheeting, or even old newspapers can serve as reliable protective barriers. This is a beneficial approach as it not only keeps the environment tidy but also prevents additional repair works later on.
A unique feature of surface protection is its adaptability. It can be tailored to fit various surfaces and situations, but it does require careful setup to be effective. Neglecting this step may result in scratches or scorch marks on flooring and furniture, creating more work for the homeowner.
Cleaning the Surface
Cleaning the surface before stripping paint is a critical task that should not be overlooked. Any dirt, grease, or loose paint on the surface can interfere with the effectiveness of the heat gun. A clean surface allows for even heating and better paint removal.
The cleaning process should involve removing loose debris and washing the surface adequately. This task ensures that the heat gun can work optimally without interruptions from contaminants. Moreover, good cleaning practices contribute to a safer working environment by minimizing potential slip hazards.
Executing the Paint Removal Process
Executing the paint removal process is a critical stage in stripping paint with a heat gun. This step effectively sets the foundation for achieving a clean, smooth surface, essential for any subsequent finishing work. The successful execution of this process can drastically reduce the time needed and minimize the potential for damage to the underlying material.
By understanding both the heating and removal methods, individuals can optimize their approach for efficiency and effectiveness. Each minute detail plays a role, ensuring that users achieve their desired results with the least amount of hassle.
Heating the Paint
Heating the paint is the initial task in the removal process. It might seem straightforward, but getting this right is essential. Proper heating is what makes the paint bubble and loosen from the surface beneath, facilitating easy removal with a scraper or another tool. It requires attention to temperature settings and the distance from the surface.
Optimal Temperature Settings
Optimal temperature settings are crucial for effective paint removal. Typically, a setting between 500 to 800 degrees Fahrenheit is recommended. These temperatures can soften most water-based and oil-based paints, making them easier to remove.
The key characteristic of this temperature range is its ability to melt the paint without scorching the wood or underlying surface. A beneficial aspect of these settings is the ability to adjust heat based on the specific type of paint being stripped.
However, one must exercise caution; exceeding these temperatures can lead to burning, which may damage underlying materials. This is crucial in many projects where historical integrity is a concern. Taking care to maintain this balance can lead to smoother and more efficient paint removal.
Distance from Surface
Distance from the surface is another important factor to consider. Holding the heat gun about six inches away from the paint allows for an even application of heat. This distance is pretty much ideal for effective bubbling without scorching.
A benefit of this distance is that it prevents potential overheating of the area, which can create additional issues. On the other hand, if the heat gun is too far away, it may not warm the paint sufficiently, resulting in ineffective removal.
Adjustments to distance may be necessary, depending on the type of paint or surface material. Nevertheless, maintaining appropriate distance is imperative for achieving favorable results.
Removing the Paint
Once the heating process has prepared the paint, the next step involves the actual removal. This can be broken down into techniques using a scraper and addressing stubborn areas that resist easy removal.
Using the Scraper
Using the scraper is a core component of the removal stage. A good quality scraper can lift bulk areas of paint easily if used effectively. The advantage of a scraper lies in its ability to quickly clear away loosened paint, streamlining the process significantly.
A critical characteristic is the flat blade that allows for smooth contact with the surface. Furthermore, various types of scrapers are available, including metal and plastic variants, providing choices based on personal preference and specific surface needs. One disadvantage might be the risk of marring the surface if excessive pressure is applied, so caution is needed.
Dealing with Stubborn Areas
Dealing with stubborn areas is often the most frustrating aspect of paint removal. Some spots may resist the heat gun's effects, especially layers that are thick or particularly old. One effective strategy involves reapplying heat to these areas to soften the paint further before using the scraper again.
A key characteristic here is the need for persistence and patience, often required in tougher jobs. This method can be beneficial but might also require repeated effort before achieving satisfactory results. Understanding when to intensify the heat or focus on specific spots will lead to better outcomes.
"Efficient paint removal is not just about speed, but about mastering every aspect of the process, from heating to scraping."
Approaching both the heating and removal processes with care ensures that homeowners and DIY enthusiasts can achieve clean results without inadvertently damaging the surrounding surfaces. Following these recommended practices can simplify the task significantly.
Safety Precautions to Consider
When using a heat gun for paint stripping, safety must be the foremost consideration. The process involves high temperatures that can lead to burns or fires. Ensuring proper safety measures are taken can minimize risks and protect both the user and the surrounding environment. It is crucial to acknowledge that, while heat guns are effective, they can also pose hazards if not handled correctly. Implementing appropriate safety precautions will help in achieving a safe and effective paint removal experience.
Protective Gear Requirements
Eye Protection
Eye protection is an essential component in the safety toolkit when employing a heat gun. The intense heat and potential release of hazardous fumes from paint can be harmful to the eyes. A good pair of safety goggles can shield the eyes from flying debris and harmful substances that may become airborne during the stripping process.


A key characteristic of safety goggles is their ability to fit snugly without gaps. This prevents particles from entering and reduces the likelihood of eye injuries. Using goggles made from polycarbonate material is a strong choice since they are lightweight yet highly resistant to impact. The advantage of this choice lies in its comfort, allowing for extended use without discomfort, making it an ideal option for many DIY enthusiasts.
Respiratory Mask
A respiratory mask is another critical safety measure when stripping paint. During the heating process, toxic fumes can be emitted, especially from older paints that may contain lead or other harmful substances. Wearing a mask can significantly reduce inhalation of these fumes, protecting the respiratory system.
The key characteristic of a respiratory mask designed for this task is its filtration capability. Masks that are rated as N95 or higher are often favored for this purpose. This type of mask filters out particulates from the air, thus ensuring cleaner inhalation. However, a disadvantage might be the discomfort some users feel when wearing a mask for extended periods. Despite this, the health benefits far outweigh the discomfort, making a respiratory mask a vital part of the safety gear.
Fire Safety Measures
Fire safety is paramount when using a heat gun, given its ability to ignite flammable materials. Ensuring that the workspace is clear of any combustible materials, such as wood shavings or cloths, is essential. It is advisable to keep a fire extinguisher within reach during the paint removal process. Utilizing a heat gun in a well-ventilated area can also reduce the accumulation of flammable fumes, further decreasing fire risks.
"Safety should always come first—being cautious can prevent accidents and ensure effective results."
Maintaining these precautions sets a strong foundation for safely stripping paint with a heat gun. Each element, from protective gear to fire safety, contributes significantly to an overall safe and successful project.
Post-Stripping Treatment
Once the paint is successfully stripped from the surface, the next step is post-stripping treatment. This process is vital for preparing the work area for future tasks and ensuring that any potential remnants of paint or chemicals are safely managed.
The significance of this stage cannot be overstated. Proper post-stripping treatment not only results in a cleaner working environment but also enhances the adhesion of any new coatings applied afterward. Therefore, attention to detail during this phase is critical.
Cleaning Up Remnants
After removing the paint, it is essential to clean up all remnants effectively. Paint chips and residue can pose risks if not managed properly. Here are some important steps to follow:
- Gather materials: Use a vacuum cleaner or a broom to collect larger pieces of paint. A damp cloth can help wipe off any remaining dust.
- Dispose of waste properly: Paint debris should be disposed of according to local regulations. Using a sealed bag for collection can ensure safe disposal and prevent spillage.
- Ventilation: Ensure that the area is well-ventilated as dust may still linger in the air after cleaning.
Employing these methods keeps the workspace tidy and minimizes hazards associated with paint remnants.
Surface Preparation for Repainting
Before embarking on the repainting process, proper surface preparation is crucial. This stage determines how well the new paint will adhere and ultimately how the finished product will look. Important steps in this process include:
- Inspect the surface: Look for scratches, gouges, or other imperfections that may need attention.
- Sanding: Lightly sand the surface to create a smooth texture. This step enhances adhesion when the new paint is applied. Use sandpaper appropriate for the material.
- Cleaning: After sanding, clean the surface again with a damp cloth. Any dust from sanding can impair paint adhesion.
In summary, post-stripping treatment is necessary for effective paint removal. It ensures a clean, workable surface, laying the groundwork for a successful repainting effort. This approach helps avoid future complications, ultimately resulting in a more professional-looking finish.
Common Challenges and Solutions
Stripping paint with a heat gun offers many benefits, but it is not without its challenges. Understanding these common issues can minimize frustration and enhance the overall effectiveness of your project. This section aims to address typical problems faced during paint stripping and to offer practical solutions.
Dealing with Multiple Layers of Paint
Removing multiple layers of paint can be daunting. Often, older surfaces have several coats applied over decades. It is essential to recognize that each layer may respond differently to heat. Here are some considerations:
- Test a Small Area: Before diving into full-scale paint removal, test in a small section. This helps in understanding how the paint reacts.
- Adjust the Heat Settings: Different paint compositions may require varying temperatures. If the paint is not softening, slightly increase the temperature but be cautious of damaging the underlying material.
- Use a Scraper Efficiently: Work on one section at a time. Heat a small area and then use a scraper to lift off the paint. If necessary, repeat the process.
- Consider Chemical Assistants: In some cases, combining heat with a chemical stripper can work more effectively. Ensure proper ventilation if you choose this method.
For best results, it might take patience and technique refinement to succeed in removing those stubborn multiple layers.
Addressing Uneven Heating Issues
Uneven heating poses another common issue. It can lead to incomplete paint removal or, worse, damage to the underlying surface. To tackle uneven heating:
- Maintain a Consistent Distance: Keep the heat gun at a consistent distance from the surface to ensure even heat distribution. Typically, a distance of around 6 inches works best, but this can vary based on the heat gun model.
- Move the Gun Slowly: Rather than holding the heat gun in one place, move it in a back-and-forth motion. This approach helps to prevent hotspots and minimizes the risk of scorching.
- Monitor Temperature Settings: If you notice that some areas are not responding, it may be necessary to adjust the settings. Sometimes a flicker of higher temperature is enough to make the paint give in without causing damage.
- Reassess Environment Factors: Factors like wind drafts or inadequate ventilation can affect results. Ensure that your workspace is shielded from such external conditions.
By employing these strategies, you can more effectively navigate common challenges associated with paint stripping using a heat gun.
Ending
The process of stripping paint using a heat gun presents a practical solution for homeowners and DIY enthusiasts. Understanding the techniques and best practices involved is crucial to achieving optimal results while ensuring safety. The advantages of using a heat gun include efficiency in removing multiple layers of paint, reduced risk of damaging underlying surfaces, and the ability to work in various environments.
Recapitulating the Facts
In summarizing the key points discussed, it’s essential to recall that a heat gun operates by emitting hot air, effectively softening paint for easy removal. Preparation is a significant factor; ensuring the area is well-ventilated and protecting surfaces from heat damage can enhance the stripping process. Choosing the right temperature settings and maintaining an appropriate distance from the surface are crucial for effective paint removal.
Moreover, safety precautions can not be overlooked. Proper gear, such as protective eyewear and masks, alongside fire safety measures, are indispensable. These considerations contribute to a safer working environment, allowing for a more focused and efficient approach.
Encouragement for Safe Practices
As we conclude this article, it is vital to emphasize the necessity of abiding by safety practices when using a heat gun. Always prioritize your well-being and the integrity of the work area. Utilizing a heat gun can be favorable, but neglecting safety measures may result in unfortunate incidents such as burns or fire hazards.
While the task of stripping paint can be challenging, following the guidelines provided leads to not only effective results but also preserves the safety of both the individual and the workspace. By integrating the recommended techniques and adhering to safety protocols, one can confidently embark on this project, ensuring a satisfactory outcome.


